

Using the Self-Regulation tool book is one of my favourite Behavior strategies.
This is such a handy tool that got me thinking that I should share some of the benefits that it could offer other students.


Detachable visuals has made this tool very popular with my kiddos. They're able to identify areas of regulation and where they find themselves. Each student has popped their name on one that's tailored to meet individual needs eg, rewards and their interests, making them individually accessible for managing their own behavior! 
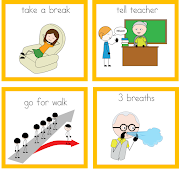 They're constantly using the visuals to remind themselves on how to get in the “ready” for work area. They can choose the supports they need and attach them to the boxes provided on each page if they find themselves struggling!The four areas identified each have visual supports for students to check out how they feel, what area they are in and what they would need to do to get ready to work.Made in 6 slightly different formats and 2 sizes has made it easy to find the best one that suits your students. Coloured tags have been added that made it faster to find the areas, along with color coordinated visuals, so no mix ups!


need to do to get ready to work.


Made in 6 slightly different formats and 2 sizes has made it easy to find the best one that suits your students. Coloured tags have been added that made it faster to find the areas, along with color coordinated visuals, so no mix ups!

FREE BONUS BOOK
"My Tool Book" coping strategy you can try as well!


